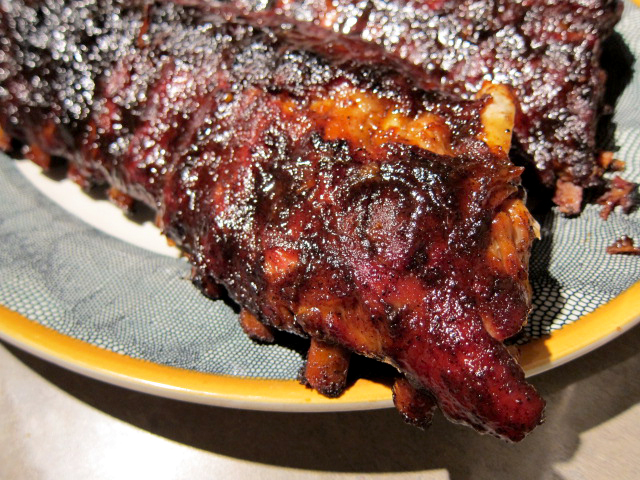
The best part about the New Orleans Saints losing in the first round of the playoffs is that we can turn away from our Sunday television sets and turn our attention to more meaningful pursuits, namely, making the most epically awesome ribs in the universe.
And this is not an intergalactic understatement. Pat, Ross and I have achieved saucy pork-bone nirvana – and we did it by employing the scientific method, some chemistry and a little bit of patience.
And beer.
And spicy potato salad (with bacon).
And ice cream.
And it was good. It was REAL good.
This started, as most food adventures are wont to do, with a bored and hungry boy… actually two of them. Surfing the Food Network, Pat, Ross and I stumbled on a barbecue competition and were shocked – shocked, I say! – to learn that the champion seared his ribs at the end of his smoke, rather than at the beginning, per the moist-and-delicious Carl Feducia method. Much discussion ensued between Pat and Ross over best practices – wet rub / dry rub, pre-sear / post-sear – and next thing I know, I come home to find two slabs of ribs in my kitchen sink.
To establish constants for our experiment, we purchased store-bought dry rubs and barbecue sauces (Buddy Stubbs Spicy)… and potato salad. The boys did all four permutations of wet rub / pre-sear, wet rub / post-sear, dry rub / pre-sear, dry rub / post-sear. We gnawed on the results… and determined that while we believed the pre-sear locked in the juices, the post-sear imbued the ribs with a certain smokiness… and while we liked the dry rub for enhancing the flavor of the meat, the wet finish provided a certain lusciousness.
Oh, and we also determined that we (I) would be making our own barbecue sauce (homemade) to apply to our new cooking technique, which follows.
BARBECUE SAUCE No. 2 (Because No. 1 was a disaster)
Tools
- Measuring cups and spoons
- Knives and spoon
- Non-aluminum, small sauce pan (apparently aluminum reacts with the vinegar – bad)
- Juicer and grater (optional)
Ingredients
- 1 cup apple cider vinegar
- 1/2 cup orange juice (it’s the juice of about 2 oranges, if you squeeze your own)
- 2 tablespoons tomato paste
- 1 tablespoon honey
- 1 cup brown sugar, packed
- 2 habanero peppers, finely chopped, seeds and membranes removed first. (Don’t panic – the heat cooks off)
- 2 teaspoons black pepper
- 2 teaspoons kosher salt
- 1 /2 teaspoon cayenne pepper
- 1/2 teaspoon white sugar
- a pinch of orange zest (and you can grate your own – but don’t go overboard on the zest or it will taste like Chinese food)
Directions

First, don’t panic. Yes, we are using habanero peppers and cayenne pepper, but you’ll be fine as long as you remove the seeds and membranes and you don’t rub your eyes after chopping them up. The pain cooks off, I promise. Second, this is not a dipping sauce like a Texas or Kansas City barbecue sauce – it’s our Southwestern version of a Carolina mop sauce. The idea is to carmelize the sugars in the sauce during the final sear – not to have something you can dip your french fries in later. This doesn’t have molasses in it, either – the sweetness comes from the honey and sugars (and my first attempt at a molasses-based sauce was … well, let’s just say it tasted like sweet, melted plastic, which is why this is called Sauce No. 2). Finally, we opted for orange juice as an added acid because it’s citrus season in the desert, and we happen to have fresh-off-the-tree oranges aplenty… and the acids in the citrus and vinegar help tenderize the meat.
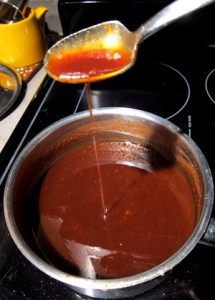
That said, pop your small sauce pan on medium heat, add your liquids, then your not-so-liquids (honey, tomato paste), then your solids (habanero, brown sugar). Stir it up and let it mix in / melt together. Then add your spices and let that bad boy bubble and merge – step back the heat to medium low and keep it there for about a half-hour. You don’t have to baby-sit it like a roux, but just keep an eye on it so it doesn’t get too thick or crusty. You want the consistency of a gumbo or stew – somewhere between a true liquid and a runny ketchup. It should be able to drip thinly off the spoon as you’re stirring.
When you taste it, you’ll have an up-front vinegar-citrus note, followed by a sweet middle and a hot finish – and again, you’re not going to dip your ribs into it when you’re done, so don’t get disappointed when it doesn’t taste like it came out of a bottle. You just want to make sure there are no off-flavors. As with any cooking adventure in this house, I would let Pat and Ross taste it as I added ingredients. Invariably, Pat would say, “More heat!” and Ross would say, “More sweet!” And this is why Momma Bear’s Barbecue Sauce No. 2 is just right: I didn’t listen to either of them.
THE MEMPHIS RUB
Ingredients
- 2 tablespoons paprika (and while you’re at it, make sure you ask Pat to pronounce this spice)
- 1 tablespoon kosher or sea salt
- 1 tablespoon onion powder
- 1 tablespoon fresh ground black pepper
- 2 teaspoons of cayenne pepper
Tools
- Bowl
- Cookie sheet
Directions
Mix the spices all up in a bowl. Put each slab of ribs (one or two or however many) on your cookie sheet. Lightly massage (rub) your rub onto your slab of ribs. In their eagerness to achieve barbecue valhalla, the lads overdid the rub, creating more of a crust than a rub. Upon further review, Pat and Ross agreed that a light tickling of the rib bones with the rub is the way to go. You’ll want to see the meat underneath… and more importantly have the rub bring out the natural meat flavors during the cooking process. So when you see our photos of the rubbed ribs, know that the boys got a little bit ahead of themselves. Rub your ribs and put them in the refrigerator to rest from all the excitement. I believe this is what the young people call “rubbing one out.”
THE RIBS
Ingredients
- Nonstick grill spray
- Ribs
- Barbecue Sauce No. 2
Tools
- Tongs
- Big-assed grill spatula
- Aluminum foil
- More cookie sheets
- Bowl
- Paintbrush or string mop for sauce application
- Platter
Directions
This is where I’m out of my element as Pat will not let me near an open flame. Spread out your aluminum foil on the cookie sheets, enough to be able to double-wrap your ribs, and set aside. Preheat your oven to 250 degrees (or if you are fortunate to have a smoker, build a low fire – we actually have a smoker, welded from the fuel tank of an 18-wheeler by my grandfather, but it currently resides in Joaquin, Texas as we have yet to determine the logistics of getting it from Texas to Arizona – but I digress). Per the Pat and Ross Method: Build a hot fire on your grill and sear the ribs on both sides. Remove the ribs to your aluminum foil, wrap them up in a nice aluminum pouch and place them in the oven for 2 hours, 45 minutes. Drink a beer. Watch some football. Dance around. If you’re Ross, giggle with glee and anticipation. If you’re Pat and Stacy, laugh at Ross.
Fire up the grill again. While it’s warming back up, pour your sauce in a bowl and lubricate your paintbrush / string mop / sauce applicator. Grab your non-contaminated cookie sheets, pull the ribs from the oven and move them back from the grill. Peel away the aluminum and behold their almost-done loveliness. If you’re Ross, giggle some more. Move the ribs directly to the grill over direct heat and play Picasso with Sauce No. 2. Sear that side. Use your tongs and big-assed grill spatula to turn them over (and be careful, they will likely be falling off the bone and into your dog’s mouth). Play Matisse with Sauce No. 2 on the second side and sear that bad boy. I’m thinking the second-searing – the post-bake sear – will last about 10 minutes. Shovel your ribs off the grill – again, they will likely be falling off the bone – and enjoy rib nirvana the Pat and Stacy (and Ross) way.
Here’s our blow-by-blow slide show so you can compare results with ours… or just ogle the rib porn: http://gallery.me.com/lanyap#100180